Quick start
In this guide you will go through the required steps to integrate Astara Connect in your own systems or platforms.
1.- Creating an account
In order to start using our APIs, you will need to register a company to retrieve an API Key for communicating with our endpoints.
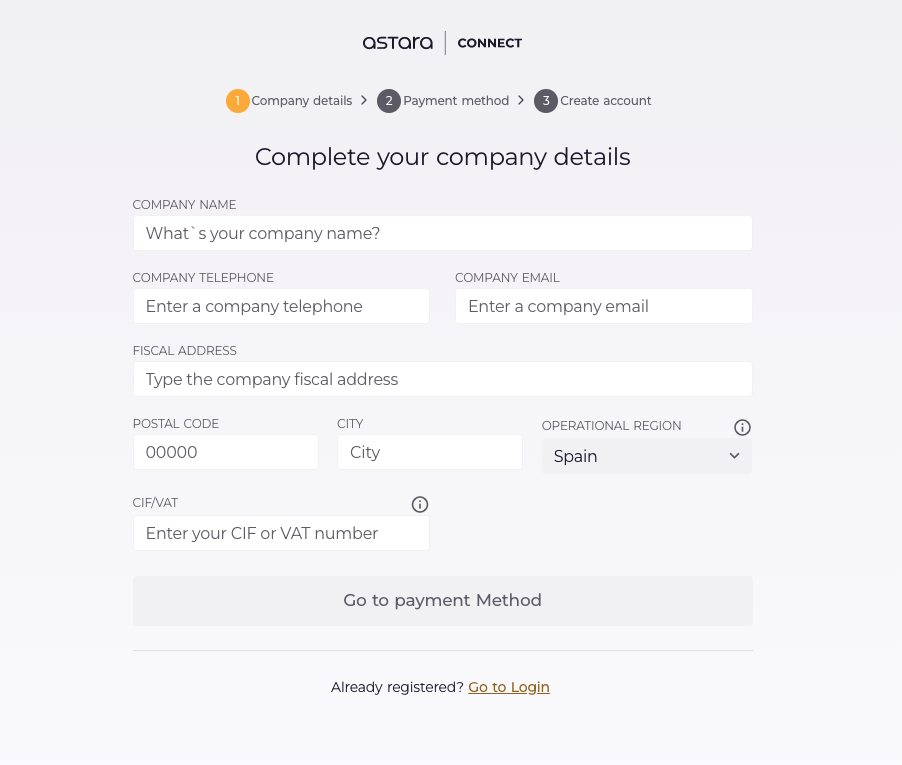
Complete the form inputs in each of the steps for creating a company. These steps are: company details, payment method and user details.
Once the registration is completed, you will receive an email to validate the user. Through the validate email button available in the email, you will be redirected to the Login screen to authenticate with your user credentials (email and password).
After user authentication, in the welcome message, you can start the process for registering a vehicle on the platform, or you can skip this step and navigate to Settings | Company section, where you can get your API Key.
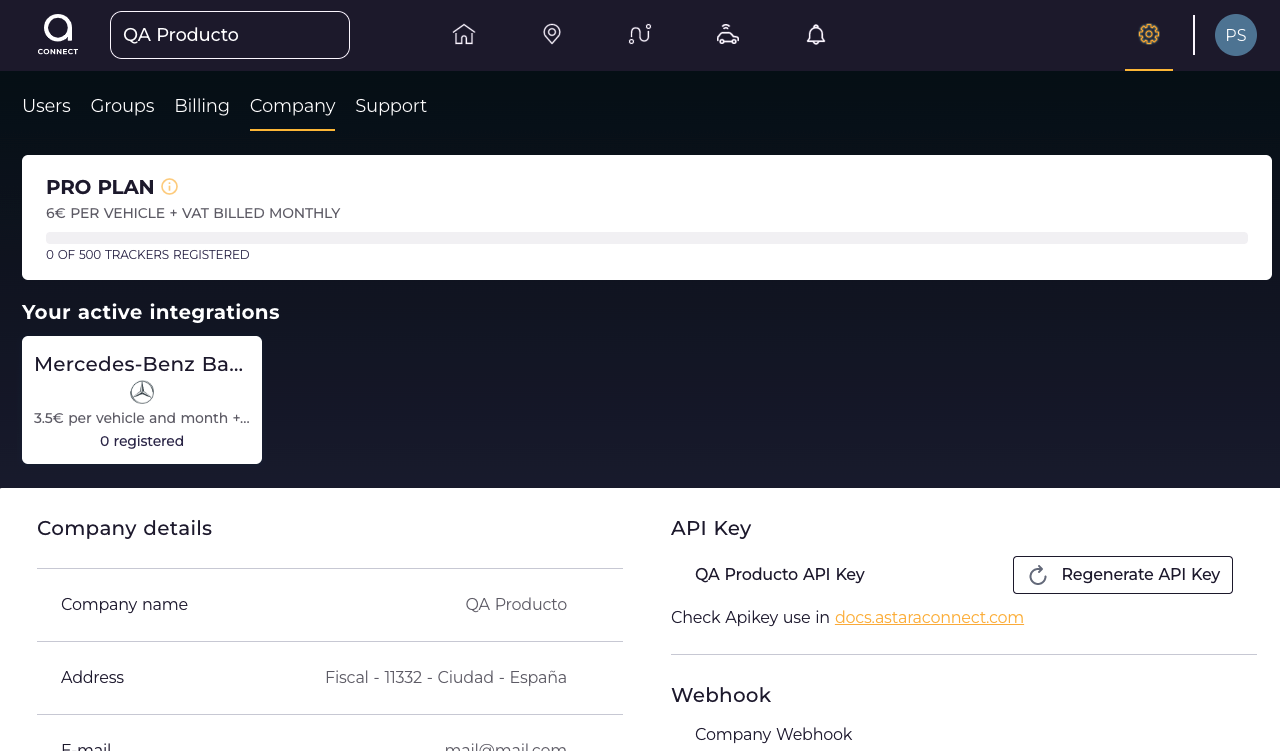
2.- Getting Company API Key
To obtain the Company's API Key follow these steps:
- Access to the platform, go to Settings | Company.
- Click on the GENERATE API KEY button, and then, confirm that you want to generate an API KEY. If it’s not the first time, keep in mind that once it’s generated, the previous API Key will no longer be available, so any use or call will report an authentication error.
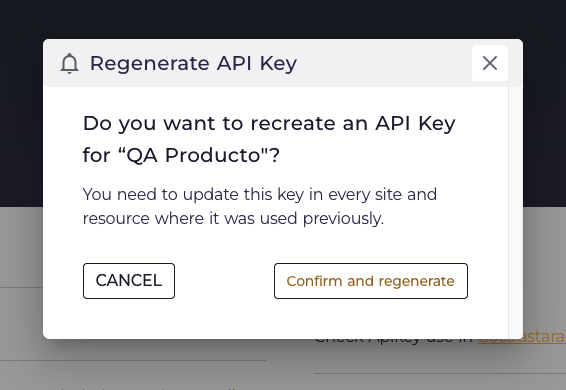
- After confirmed, the API KEY will appear on screen, copy and save it safely, you will only be able to see it while the modal window is open.
The API Key is unique, and by default is not generated, because it authenticates the company via API.
With the company's API Key you can start using the API endpoints. Check the way to start at [enlace_authentication]
3.- Registering your first tracker
Once you have an account, you will need to register a tracker so you can start getting geo-data that Astara Connect will process and give you insights.
A tracker is a device that is connected to a vehicle (or moving object) that will be sending at least the following information:
- Latitude.
- Longitude.
- Timestamp.
In order to register it, you will need to find out the default group that your account has access to.
1 | |
There you will have the OIDs and extra data of the groups where you can register a tracker to. Pick one, and save the OID for using it later on.
Now, register the tracker:
1 | |
You will have to send a JSON payload similar to this:
1 2 3 4 5 6 7 8 9 10 11 12 13 | |
Info
The object_id can store any metadata from your vehicle. By default, we recognize some keys like license_plate, make, model, version, vin, ean, serial_number as those are common fields within the cars, vans, bikes, kickscooters and trucks. But you can store as much information as you want.
To finish the tracker registration, you will need to launch the validation procedure. It's a security step that lets us know that you have the rights to access the tracker data.
1 | |
4.- Getting telemetrics data from your tracker
Now that you have the tracker, as soon as the tracker is validated by the system, you will be able to start getting telemetrics data from it like its last position. In order to check if the tracker is receiving data properly, get the tracker and check its status value. If its value is true, then, your tracker is fully working within Astara Connect:
1 | |
And it will return something like this:
1 2 3 4 5 6 7 8 9 10 11 12 13 14 15 | |
Then, with that tracker's oid you can get its last saved position:
1 | |
And that will give you something similar to this:
1 2 3 4 5 | |
4.- Next steps
This guide has covered the main basics, for setting you up quickly. Now we recommend you to explore our documentation and get an idea about what Astara Connect can offer you. We recommend you to read the following sections of our documentation: